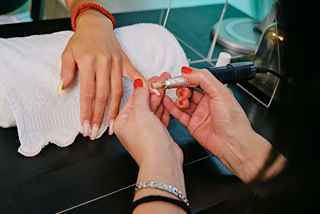
Acrylic nails have been a popular choice for those seeking long-lasting and durable nail enhancements. However, as much as we love the glamorous look they provide, there comes a time when they need to be removed. While visiting a nail salon is always an option, learning how to safely remove acrylic nails at home can save time and money. In this comprehensive guide, we’ll walk you through the step-by-step process of safely removing acrylic nails in the comfort of your own home, ensuring the health and integrity of your natural nails.
Gather Your Supplies
Before embarking on the acrylic nail extensions removal process, it’s essential to gather all the necessary supplies. You’ll need acetone, cotton balls or pads, aluminum foil, a nail buffer, cuticle oil, a nail clipper, and a nail file. Having these supplies on hand will make the removal process more efficient and ensure you have everything you need to achieve the best results.
Trim and File
Start by trimming your acrylic nails as short as possible without cutting into your natural nails. This step will make the removal process more manageable and less time-consuming. Use a nail clipper to trim the acrylic nails to your desired length, then gently file the surface of each nail to remove any shiny topcoat. Be careful not to file too aggressively, as this can damage the surface of your natural nails.
Prepare the Acetone Soak
Pour acetone into a small bowl, ensuring there’s enough to fully submerge your fingertips. Acetone is a powerful solvent that effectively breaks down acrylic nails. However, it can be harsh on the skin, so it’s essential to take precautions to protect your skin during the soaking process. You can also add a few drops of essential oil to the acetone to help mask the strong smell.
Protect Your Skin
Before soaking your fingertips in acetone, apply a layer of petroleum jelly or cuticle oil around the edges of your nails. This will create a protective barrier and help prevent the acetone from drying out your skin. You can also wear disposable gloves to further protect your hands from the acetone.
Soak Your Nails
Dip a cotton ball or pad into the acetone and place it directly onto your nail. Wrap each fingertip with aluminum foil to secure the cotton in place and create a seal. Allow your nails to soak in the acetone for 20-30 minutes. During this time, you may experience some tingling or slight discomfort, which is normal. You can also soak a small towel in warm water and wrap it around your hands to help speed up the process.
Remove the Acrylic Nails
After the soaking period, carefully remove the aluminum foil wraps from each finger, taking care not to spill the acetone. Use a gentle twisting motion to lift the softened acrylic nails from your natural nails. If the acrylic does not easily come off, rewrap the affected fingers and soak for an additional 5-10 minutes. You can also use a cuticle pusher or orangewood stick to gently push the acrylic away from your nails.
Buff and Moisturize
Once all the acrylic nails have been removed, use a nail buffer to gently smooth out any rough edges or residue left behind. Be careful not to buff too aggressively, as this can damage the surface of your natural nails. After buffing, wash your hands thoroughly to remove any remaining acetone residue, then apply cuticle oil or a nourishing hand cream to moisturize and hydrate your nails and skin. You can also apply a strengthening nail treatment to help repair any damage caused by the acrylic nails.
Conclusion:
Removing acrylic nails at home can be a simple and cost-effective process when done correctly. By following this step-by-step guide and taking the necessary precautions, you can safely remove your acrylic nails without causing damage to your natural nails or skin. However, if you’re unsure or uncomfortable with the process, it’s always best to seek professional assistance from a reputable nail salon. With patience and care, you’ll soon be flaunting your natural nails with confidence and style.
To read more related Click Here


