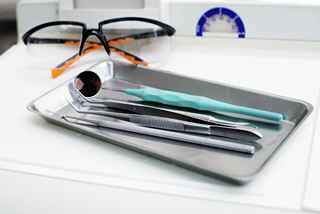
Proper cleaning of dental instruments is the first critical step in preventing cross-contamination and ensuring patient safety. Effective cleaning not only extends the life of the instruments but also ensures that sterilization processes are successful. This guide provides detailed steps and best practices for cleaning dental instruments thoroughly and safely.
Why Cleaning Dental Instruments is Important
Before sterilization, instruments must be free from blood, tissue, and other biological contaminants. Incomplete cleaning can result in:
- Ineffective sterilization.
- Compromised patient safety.
- Shortened lifespan of valuable instruments.
Essential Steps to Clean Dental Instruments
1. Pre-Cleaning at the Point of Use
- Immediate Rinse: After use, rinse instruments under running water to prevent debris from drying.
- Avoid Scrubbing: Use a soft brush or wipe; avoid abrasive materials that could damage the instrument surface.
2. Transport to the Cleaning Area
- Place instruments in a covered container marked as “biohazard” for safe transport. This minimizes the risk of exposure to staff.
3. Manual Cleaning Process
- Preparation: Wear appropriate personal protective equipment (PPE), including gloves, goggles, and gowns.
- Soaking: Immerse instruments in a warm enzymatic or detergent solution to loosen debris.
- Brushing: Use a designated brush to clean all surfaces, paying special attention to joints and crevices.
- Rinsing: Thoroughly rinse the instruments with distilled or demineralized water.
4. Automated Cleaning (Optional but Recommended)
- Ultrasonic Cleaners: These devices use sound waves to dislodge contaminants from hard-to-reach areas.
- Loading: Place instruments in a mesh basket, ensuring they do not touch each other.
- Solution: Use a cleaning solution specifically designed for ultrasonic devices.
- Washer-Disinfectors: These machines combine cleaning with thermal disinfection. Follow the manufacturer’s instructions for proper loading and cycle settings.
Inspection Before Sterilization
After cleaning, each instrument should be visually inspected for:
- Residual debris.
- Damage or corrosion.
- Proper function (e.g., checking hinges or tips for alignment).
Any compromised instruments should be replaced or sent for maintenance.
Drying and Packaging
- Drying: Ensure instruments are completely dry to prevent rust or damage during sterilization.
- Packaging: Place instruments in sterilization pouches or wraps. Include a chemical indicator to confirm exposure to sterilizing agents.
The Link Between Cleaning and Sterilization
Proper cleaning is a prerequisite for effective sterilization. Any organic residue left on instruments can shield bacteria from sterilization processes. To ensure complete infection control, thorough cleaning must always precede sterilization.
For an in-depth guide on sterilization procedures, check our Dental Sterilization resource.
Best Practices for Maintaining Clean Instruments
- Regular Maintenance: Sharpen and lubricate instruments as needed.
- Use High-Quality Cleaners: Choose enzymatic detergents designed specifically for dental tools.
- Training Staff: Ensure all team members are trained in proper cleaning protocols to maintain consistency and safety.
Conclusion
Properly cleaning dental instruments is essential for patient safety and infection control. By following these steps—from pre-cleaning to inspection—you can ensure that your instruments remain in top condition and are ready for sterilization. This process not only protects your patients but also extends the life of valuable Dental Tools.
By implementing these best practices, your dental practice will maintain high standards of hygiene and efficiency, fostering trust and delivering top-quality care.


